|

|

|

|
|
Candidates for stripe detailing for the side of the fuselage. Decided to go with the center example.
|
Trial run for fuselage stripe detailing.
|
Prepping the fuselage for paint. Guide coat sprayed over primed surface for wet sanding.
|
Wet sanding strakes
|

|

|

|

|
|
Fuselage painted white first. Lines for placement of stripe detailing being ste.
|
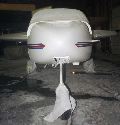
Stripes projected forward to meet at nosetip.
|
Stripe on sides positioned to bypass fresh air NACA inlet ...
|
... and pitot tube on other side.
|

|

|

|

|
|
Lines extended rearward.
|
Fuselage prepped and ready for red and blue paint. The red and blue paint goes on top of the base white and everthing is covered with a thin clear coat.
|
Creating stripes entails laying out tape to form the borders of the stripes and the interspersed thin white lines.
|
All white surfaces masked - almost ready for paint.
|

|

|

|

|
|
Checking alignment.
|
Innermost (red) stripe masking removed.
|
Red paint laid down first.
|
First sweep leaves red stripes complete.
|

|

|

|

|
|
Next, the masking covering the area on fuselage corresponding to the blue stripes is removed.
|
The newly painted red stripe is covered with masking tape.
|
Then, blue paint is sprayed down.
|
Halfway done! After the stripe paint is laid down, the masking is stripped off and a very light clear coat sprayed on.
|

|

|

|

|
|
Multiple views of the newly painted stripes!
|
|
|
|

|

|

|

|
|
The clear coat is partially "bladed" off making the striped surface even with the surrounding surface.
|
|
The clear coat over the fuselage is buffed and N724X is ready to return to the hangar.
|
N724X is loaded onto a trailer for the trip home.
|

|

|

|

|
|
Just a little bit wide but it's only a mile or so. We get lots of curious looks.
|
Uh oh! A moment of worry: but with a toot of the horn and a friendly wave from the local sheriff, we pass on to the airport.
|
Returning home!
|
The wings are next, first sprayed with guide coat ...
|

|

|

|

|
|
... and the laborious process of wet sanding begun.
|
In Anthony's workshop, some touchup work is done.
|
Anthony points out newly prepped areas.
|
Getting ready for paint.
|

|

|

|

|
|
|
|
The paint process begins with a wing painted in its entirety. Inside the paint booth, the undersurface is sprayed.
|
|

|

|

|

|
|
After the wing is painted white, the detailing on the outer surface of the winglets is next.
|
In a similar fashion as the stripes on the fuselage, tape is laid out to demarcate the vaiuos colors.
|
A local sign store supplies a template for the N number which is placed in position. The template has an adhesive backing which holds it in position.
|
Removing the covering after the stripes have been painted. Note N number in place under covering paper.
|

|

|

|

|
|
Final product! The stripes and N number are clear coated and blended into surface as were stripes on fuselage leaving a smooth surface.
|
My mother, Inez Guerra, inspects the paint job.
|
Paint looks great so I and my parents start putting it all back together.
|
Mom and Dad stand next to a newly reassembled N724X, just after a test run.
|

|

|

|

|
|
Ready for first flight (again!) This time, we go early in the day because by noon, density altitude is 10,000 feet. (It's HOT!)
|
Still some fine tuning required, but the outside looks nice and clean.
|
|
|

|

|

|

|
|
|
|
Some views of N724X in final paint.
|
|

|

|
|
|
|
 Comments, questions, and suggestions are welcome! email: rich@rguerra.com