|
|

|
|
|
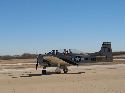
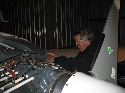
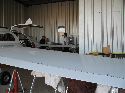
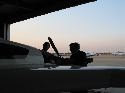
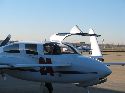
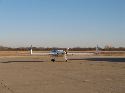
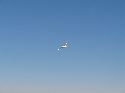
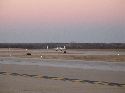
TKI is a fairly busy place and one often sees some pretty cool planes pass through. Here, a T28b taxis by.
|
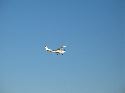
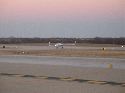
With a throaty roar, the T28B leaps skyward!
|
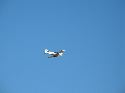
It's a beautiful day to fly!
|
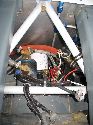
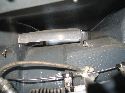
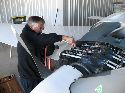
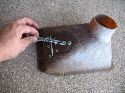
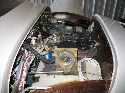
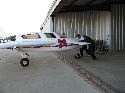
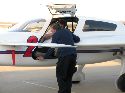
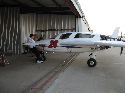
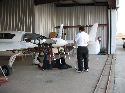
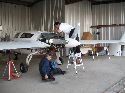
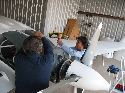
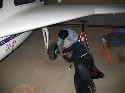
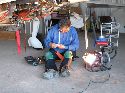
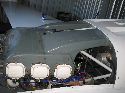
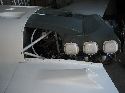
First things first. Dad and I pull the cowling and the back half of the plenum to inspect the engine and to get at the plugs.
|
|
|
|
|
|
Fuel spider for the fuel injection system.
|
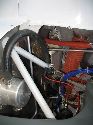
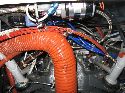
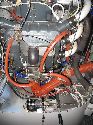
View from above engine, in between air intake ducts fromt he NACA scoops. Vacuum pump center left. Oil pressure sensors times 2 seen center right. Electrical plug is for engine heating system.
|
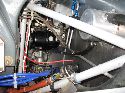
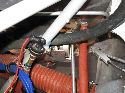
Side view of engine from copilot side. Oil air separator top right Black Magneto for upper plugs center. Brownish cables go to upper plugs . Mechanical fuel pump just below magneto. Blue cables from Jeff Rose electronic ignition are for lower plugs. Fuel pressure sensor lower center. Fuel tank venting system seen against firewall.
|
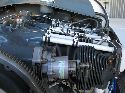
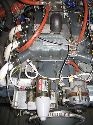
Top of engine from rear of plane, copilot side. Prop govenor lower center. Oil dipstick top center. Fuel spider top left.
|
|
|
|
|
|
Top of engine from rear of plane, pilot side. Prop govenor lower center. Oil dipstick top center. Fuel spider top right. Fuel line running from below withing fire sleeve.
|
Looking into NACA ducts, pilot side, from the rear. Note deflector riveted in place to divert some of the stream to cool the cylinders closest to the firewall. THese two cylinders tend to run the hottest since air stream flow over and past them without the diverter.
|
Fuel spider.
|
Copilot side NACA duct from rea of plane. Diverter plate for cylinder closest to firewall seen.
|
|
|
|

|
|
Another view from above between the NACA ducts. Firewall at top. Oil temp probe seen just below the oil filter. Large caliber black hose lower center going to right leads to oil air separator.
|
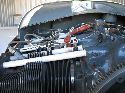
From above copliot side looking down. Lage orange SCAT tube is from air induction system to throttle body.
|
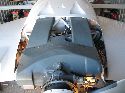
Top view of engine looking from the rear of plane.
|
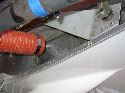
Air compressor is noisy but useful! Needed a little tweak to address an air leak.
|
|
|

|
|
|
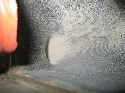
Dust blown off engine.
|
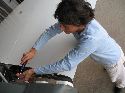
Spark plugs were pulled and sandblasted clean using this simple but effective (and a little messy) tool.
|
|
Checking the spark plug gaps. Top gaps set at 0.18 for magneto, bottom at .32 for electronic ignition.
|

|
|
|
|
|
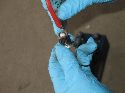
Adjusting the spark plug gap.
|
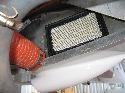
The housing for the air inction filter is removed. This is located in copilot wing root. Filter is removed revealing the ducting built into the wing root.
|
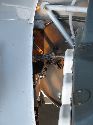
A closer look into the duct. An air induction scoop is located on the wing below this point and funnels air through here.
|
Filter housing. Back of spring loaded emergency air intake seen at left.
|
|
|
|
|
|
Rear of filter housing showing spring for emergency air intake. If the air induction scoop or filter is clogged, say with ice, this door pops open and allows passage of air into the engine.
|
Purolator Premium air filter A13192 in place. The housing and duct was fabricated around this filter so it is a perfect fit. The filter housing is fitted back on top of the filter and secured into place with screws and the SCAT tubing reconnected.
|
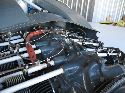
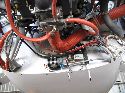
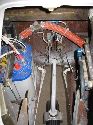
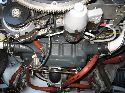
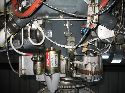
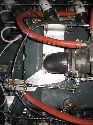
View from underneath engine looking toward firewall. Bottom center is Weldon electric fuel pump. Just to right of it is Jeff Rose Electronic Ignition controller with coils extending upwards. Velocity electrical system connection block seen to right of coils. Top center is throttle body.Bottom left coming out of pilot side wire duct are firesleeved vacuum line, control cables (throttle, mixture and prop) and oil lines (steel sleeved). Copilot wire duct has electrical lines.
|
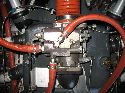
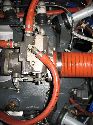
Back of throttle body. At left of unit is throttle adjustment, at right mixture. Firesleeved fuel lines seen leading to and from unit. Line curving left goes to fuel flow sensor and from there, up to top of engine and fuel spider.
|
|
|

|
|
|
After cleaning the plugs, they are set into place and spark plug wires screwed into place.
|
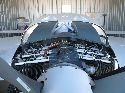
Canard cover removed and top exposed. Nose of plane is at bottom of picture. At left, S-Tec pitch servo. Blue unit is pressure sensor used by autopilot. To right of blue sensor is a second encoder which sends altitude info to MX20. Below it is avionics fan. Square gray box is Aerotronics annunciator controller, black rectangular unit is light dimmer for instruments. Black cylindrical pitch trim servo seen with fiberglass spring. At far right is the Garmin GPS antenna.
|
Top of canard looking at back of instrument panel. You can see rear of avionics racks and connectors and cables to antennas, etc.
|
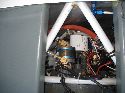
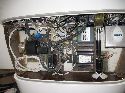
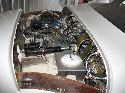
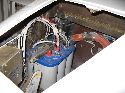
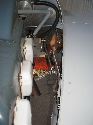
Nose compartment looking through the nose hatch from the front (copilot side). At left, the hydraulic system controller with starter and master solenoids. Optima Deep Cycle battery generates lots of power for cold cranking days! Hydraulic pump hiding behind batery.
|
|
|
|
|
|
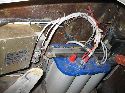
Pilot side of nose compartment. Two brake master cylinders with vacuum line in between going through the canard bulkhead.
|
Pilot side nose compartment more forward showing the nose oil cooler with duct system designed to draw air from in cabin and recirculate into cabin or out bottom of plane.
|
Looking forward into tip of nose. Top of landing light seen.
|
Looking into nose compartment from the nose. Hydraulics to pull up nosegear doors after retraction of nosegear strut seen at center.
|
|
|
|
|
|
Top of canard seen from pilot side.
|
Top of canard seen from copilot side.
|
Landing gear controller, battery and hydraulic pump in nose compartment.
|
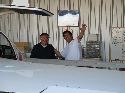
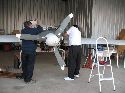
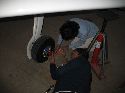
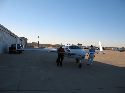
Dad and I confer over the next steps in the inspection.
|
|
|

|

|
|
My wife , Pam, drops by the hangar and we take the time to say "Hi!"
|
After the oil is changed and plugs cleaned, gapped and reinstalled, we puch N724X out to fire up for a test.
|
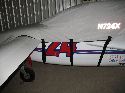
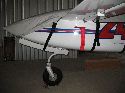
Checking the nose wheel tightness. DOn't want to have shimmy! I have the upgraded nosegear strut with beefed up support gussets. See the section "An Oshkosh Miracle!" for details of what happened when the nosegear cracked and how it was fixed at OSH.
|
"CLEAR PROP!!" Hitting the starter button.
|
|
|
|
|
|
Dad watches from the side to look for leaks and stuff falling off!
|
Running up the engine. The brakes barely hold at higher power settings.
|
Is anything falling off?!
|
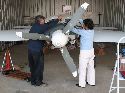
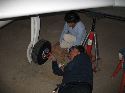
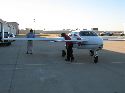
Dad and I confer. Engine data looks good on the gauges and the engine looks great on the outside.
|
|
|
|
|
|
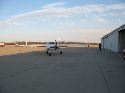
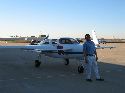
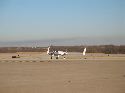
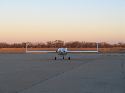
Looks like we're ready to taxi a bit ....
|
Ready to go for a quick jaunt on the ground. The Cleveland brakes, probably the best upgrade we've made on the plane, function very well.
|
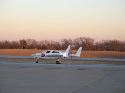
Taxiing back to hangar. Everything handles well.
|
Pulling the plane back in isn't all that hard. Note the hydraulic jacks used to swing the gear. They are conveniently "stored" in position underneath the wings, ready to be used and out of the way.
|
|
|
|
|
|
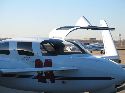
Looking for leaks, loose wires, etc.
|
Peering at engine from all angles.
|
Satisfied that the engine is all clear, Mom starts to secure the back of the plenum back in place.
|
Mom and Dad make a great team!
|
|

|
|
|
|
The covers to the access holes for the sparkplugs are replaced.
|
Mom checking the plenum screws.
|
Final tightening of all the plenum screws.
|
I need a shave..... hey, I'm on vacation!
|
|
|
|
|
|
The sun sets on our day - nearly done!
|
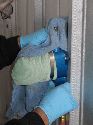
We check the toe in of the main gear using a laser leveler. The beam is projected both fore and aft and the measurements made to the fromt of the plane and to a point just behind the wheels.
|
Making the mark on the floor.
|
Notice the faint laser line projected forward.
|
|
|

|
|
|
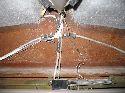
Inside the cabin: behind the rear bulkhead. Fuel vent system seen. The curved tube goeas through firewall and extends todownward to potrude out the bottom of the fuselage and is angled forward to form a scoop to push air into the tanks to allow fuel to drain by gravity.
|
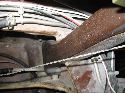
Top of main gear leg, resting in its socket. Cable used to retract it is seen crossing center of photo.
|
Looking downward behind rear bulhead. Sump tank at top of photo with upper and lower input lines from pilot side strake fuel tank top left and center placed sump tank fuel vent at top left. Pulleys for main gear retractration cables at bottom center.
|
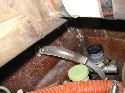
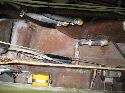
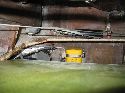
Airflow performance fuel filter at center. You can see nylaflow brake line passing into a larger tube that forms a duct running along the main gear. Yellow ELT at bottom left.
|
|
|
|
|
|
|
A little silicon blocks a small gap in plenum to insure as much air as possible is forced through the cooling fins.
|
Plenum is buttoned up, almost ready to go. Blue masking tape tab tells us that there is still something missing. The plenum is safety wired together underneath.
|
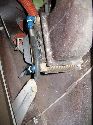
Detail of the pilot side aileron bellcrank. Lines to oil cooler in wing root seen resting on top of push-pull cable in firesleeve.
|
|
|
|
|
|
Detail of copilot side aileron bellcrank. Note push rod from S-Tec roll servo attached to assembly. The servo is behind a shield to protect it from heat.
|
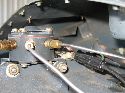
Copilot side detail. Blue electronic ignition cables at left corner. Fuel pressure sensor at left center. Large black tube is to oil air separator. Rudder cable at right center. Firesleeved aileron push-pull cable running vertically down center of screen.
|
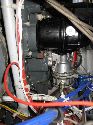
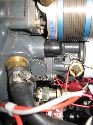
From the side looking from copilot side. Magneto and mechanical fuel pump in center.
|
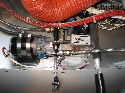
From above center, looking down just behind firewall. Vacuum pump at top. Oil filter at right center. Oil temp probe just behind it.
|
|

|
|
|
|
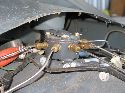
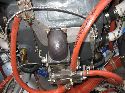
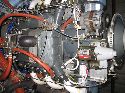
Bottom of firewall. Weldon electric fuel pump left center. Electroair EI controller near center. Small black tube is for mainifold pressure sensor to allow the controller to adjust timing as the throttle is advanced.
|
Checking for leaks, loose stuff, etc.
|
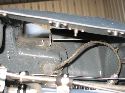
Engine looking from copilot side.
|
Engine looking from pilot side.
|
|
|
|
|
|
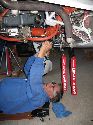
Dad tightens engine bolts.
|
View from rear of plane. Top left 60 amp Mitsubishi alternator from Mark Landoll Starters and Alternators 1205 Redbud Lane, Newcastle, OK � 73065. �Phone: 405-392-3847. Great service! Top center is Sky-Tec starter. Orange firesleeve fuel line leading from fuel servo to left of picture goes to fuel flow sensor then up to top of engine to fuel spider then to injectors.
|
Looking up from below. Firewall at top, rear of plane toward bottom of picture. Weldon pump at top. Orange tubing channels air from air induction scoop to engine.
|
Fuel servo from below. Front of plane is toward top of picture. Throttle control at right side of fuel servo, mixture control at left.
|
|
|
|
|
|
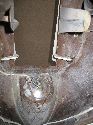
From below, prop at bottom of photo. Sky-Tec starter bottom center left, alternator bottom center right. Oil sump top of photo. You can see the Reiff Heater strip at top center.
|
Overview of underside of engine. Propeller at right of photo.
|
Looking from back of plane toward firewall.
|
Looking from back of plane toward firewall.
|
|
|
|
|
|
Prop at left, starter and alternator at right.
|
Pop governor control cable attached to bracket at top center.
|
Underneath the engine. Oil sump quick drain bottom right.
|
Underneath the engine. Oil sump quick drain bottom left. Fronto of plane to right of photo.
|
|
|
|
|
|
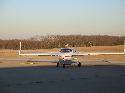
This is it!! Dad and I roll the plane back for the post annual condition inspection test flight and first flight of the new year!
|
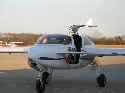
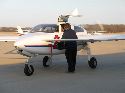
Preflight inspection.
|
|
|
|
|
|
|
|
Ready to go!!!
|
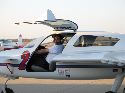
Strapping in!
|
Setting up the overhead switches for start!
|
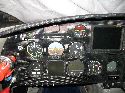
Engine gauges in the green...
|
|
|
|
|
|
|
Door closed and calling ground to taxi....
|
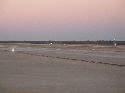
"Taxi to runway 17 ..."
|
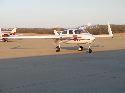
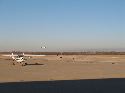
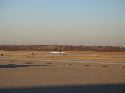
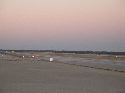
It's a beautiful day with lots of planes in the pattern ...
|
|
|
|
|
|
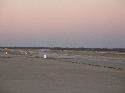
Taxiway alpha to 17 ...
|
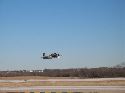
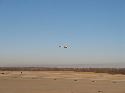
Off the ground! Wheels up!
|
Main gear already up, next comes nosegear.
|
Rocking wings to say goodby to the family on the ground. I've always thought the plane looks funny with just the nosewheel hanging out...
|
|
|
|

|
|
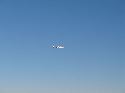
Nosegear almost fully retracted as we pass about the 3000 foot point on the runway ...
|
Vigorously rocking wings ...
|
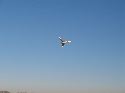
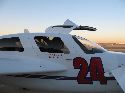
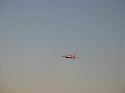
... RACE 24 soars!!!
|
... and with a final wiggle of the wings, is gone!
|
|
|
|

|
|
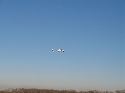
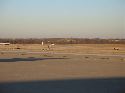
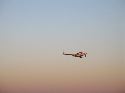
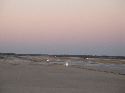
Another nice plane passing by ...
|
After a good long shakedown cruise, we're back on the ground ...
|
Turnong off at taxiway Charlie (roughly 2700 feet from the end of the runway)
|
|

|
|
|
|
|
Anyone else want to take a ride?
|
The sun is setting but there's still time....
|
A happy wave as I swing the plane back around to ready for the next flight.
|
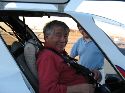
Chief Mechanic Ricardo Guerra, Sr., straps in to enjoy the fruits of his labor.
|
|
|
|
|
|
Dad is ready to go!!
|
AirVenture Cup Racer RG, Sr.!!!
|
Taxiing back out to the runway....
|
Strobes flashing in orange glow of sunset....
|
|
|
|
|
|
Up and away!!
|
The rays of the setting sun bathe N724X as we leap skyward!!
|
Rocking our wings ....
|
... as we fly into the twilight.
|
|
|
|
|
|
It's not quite sunset yet but the canard lights and landing light in the nose make us easy to see!
|
|
Easing her in ....
|
About to touch down....
|
|
|
|
|
|
On the ground ....
|
Slowing up to turn of the runway. Cleveland brakes work like a charm!!
|
Turning off on Charlie again ...
|
The airport is really quiet so the tower tells me to simply shut down on the ramp to pick up another passenger!
|

|

|
|
|
|
I load up yet another AirVenture Cup Racer, my Mom, Inez P. Guerra, for a quick local flight ...
|
Is not really as dark as it seems but still, the canard lights and landing light works well to improve visibility...
|
Dad directs me into the hangar. I use the landinging light often to line me up on a center stripe painted on the hangar floor...
|
The cover goes on. See the Instrument Panel section for details of construction.
|
|
|
|
|
|
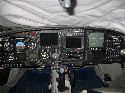
Pilot's side of panel. The throttle is locked up already.
|
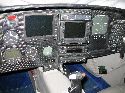
Pilots' Eye view of the panel "6-pack" ...
|
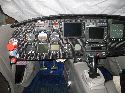
In flight, looking over toward the center stack yields this view....
|
Cover strapped in place....
|
|
|
|
|
|
|
|
N724X slumbers now, ready for another great year of adventure!!
|
It's nightime now .... Dad closes up shop and we head for home....
|
 Comments, questions, and suggestions are welcome! email: