Click on thumbnails to view larger versions of the pics!
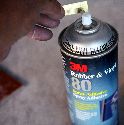
Malcolm has flown off but still follows closely from afar. Soon after Malcolm departs, N724X is successfully test run. This time, I take the opportunity to have my prop dynamically balanced by the Jet Center. Lots of taxi testing follows and we tweak the engine some more, finding an ignition timing problem which caused engine overheating. The new brakes are absolutely phenomenal, providing a dramatic improvement in stopping power, especially important here in a high density altitude area. Taxi testing with some pulling to one side lead us to check and readjust the main gear toe-in. This gives an opportunity to show the new brake setup as we disassemble it to place shims. Then, it's 'First Flight' again!
Click on thumbnails to view larger versions of the pics!
 |
 |
 |
 |
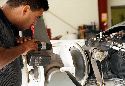
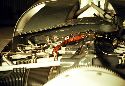
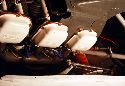
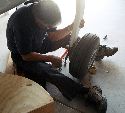
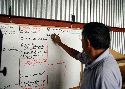
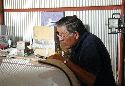
| N724X is taxiied over to the Santa Fe Jet Center to have the propeller dynamically balanced. | Art reattaches the spinner. The prop is balanced with all equipment installed | The prop spins up. The sensor is seen atached to the engine centerline. It keys off a lightbeam bounced off a reflective strip at the base of one of the blades which you can see on the topmost blade. | Art runs the calibration as I step through various set RPMs. |
 |
 |
 |
 |
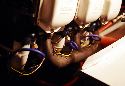
| An index mark on the prop bulkhead... | ...which is matched to one inside the spinner to insure that the system is reassembled in exactly the same way as it was balanced. | The calibration device calculates the exact position and amount of weight required to balance the prop. A hole is drilled in the bulkhead and the weight added in the form of washers. | The prop is balanced with the addition of a small amount of weight placed in a position referenced from the index mark.. |
 |
 |
 |
 |
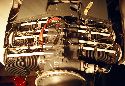
| One last thing before the plenum is buttoned up. Adel clamps are placed in accordance to ADs to support the lines to the fuel injectors. All tiewraps holding the wires from the magneto are removed from the fuel spider lines and attached elsewhere. This will prevent any repetitive forces from vibration from wearing on a fule line and perhaps cracking it. The fuel line from the throttle body below is rerouted UNDERNEATH the fuel spider lines, again, to avoid damage to the more delicate fuel injector lines. This will be the final configuration in which we maintain the engine wiring and lines setup on top of the cylinders. | Another view of wiring and fuel line setup. | Closeup detail. Notice the magneto wires routed through the plenum. The hole is sealed up with silicon to prevent air leak and chafing of the ignition wires. | |
 |
 |
 |
 |
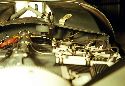
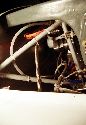
| Copilot side aileron push-pull cable and bell crank assembly. The S-Tec roll servo is seen with its push rod parallelling the aileron cable. The enclosure serves double duty as motion stop and as a partial heat shield to protect the servo. | Another view of the bellcrank showing oversized washers in place to prevent bearings at the end of the rod from popping out and therefore losing the control over that aileron. | Detail of wiring neatly held out of the way from the heat of the exhaust manifold. | Pilot side aileron bellcrank. The steel braided lines go to and from the wingroot oil cooler. You can see one line resting on the bellcrank bracket. To prevent wearing ont he line it is wrapped with a thick segment of palastic tubing. |
 |
 |
 |
 |
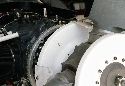
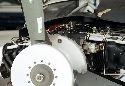
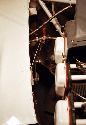
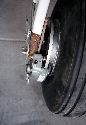
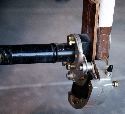
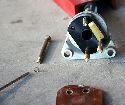
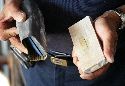
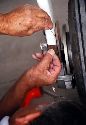
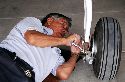
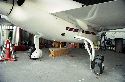
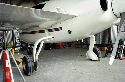
| Detail of conduit routing between engine and firewall. The white hose is the vacuum line to the vacuum pump seen with the blue stripes. We will replace this with a metal line in the future for improved durability.The steel braided lines carry oil first to the nose oil cooler, then back to the wingroot cooler, t hen back to the engine. The black rubber hose is the return line from the oil-air seperator. Notice the magento wires are held neatly together with plastic braiding. The Jeff Rose electronic ignition timing unit is the rectangular box just below the vacuum pump. The white oil filter is seen sticking out to the left. | The Cleveland brake system, now recommended by the factory for XL sized Velocity's. I had obtained a set from Aircraft Spruce. The 600x6 wheels and 30-52 brakes were billed as being for a Defiant and also came with two master cylinders I didn't need since the existing ones worked just fine. The Velocity factory now supplies kits that don't include the master cylinders AND also come with the custom made spacers required for a retrofit on existing psystems. The Matco axles work fine so the retrofit can be made without too much trouble. HIGHLY RECOMMENDED for XL's. Because the toe-in needed to be checked and adjusted, the following sequence of pics show disassembly of the brake and axle. | ||
 |
 |
 |
 |
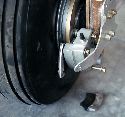
| Wheel removed showing the phenolic spacer (brown) which also provides some heat shielding for the gear leg. | |||
 |
 |
 |
 |
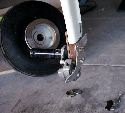
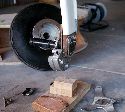
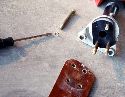
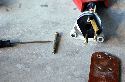
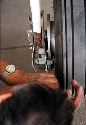
| Brake now loose on the nylaflow. | Phenolic and metal spacers - the two custom parts needed from the factory to upgrade to this brake system. | A thin shim is made sticky with a little adhesive spray to allow ease of placement and then reassembly of the axles and wheels. | Shim is placed between axle and spacer. |
 |
 |
 |
 |
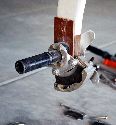
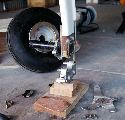
| Brake linings. | Very fine adjustments are made by shaving tiny fractions off the shim. | Shim to go in between axle and phenolic spacer. | |
 |
 |
 |
 |
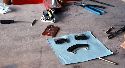
| Shim seen peeking out behind the axle. | Shim eased into position before tightening bolts. | Wheels reassembled and main gear door support plates back in position. | Reassembling the wheels and brakes. |
 |
 |
 |
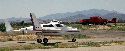 |
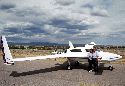
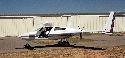
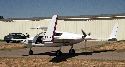
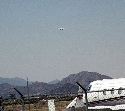
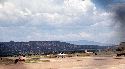
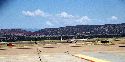
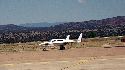
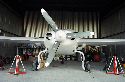
| Toe-in adjustments complete and fast taxiing tests successfully performed, Mom and Dad enjoy the Santa Fe vistas with afternoon cumulus buildup added for dramatic impact. | After the wheels are set and cowling buttoned up, FINALLY ready for another "First Flight" Thumbs up and we're off! | Taxiing around the corner. | |
 |
 |
 |
 |
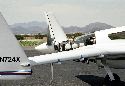
| First flight in new paint! | Off into the blue! | ||
 |
 |
 |
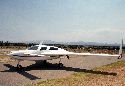 |
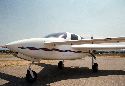
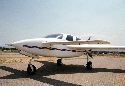
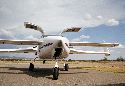
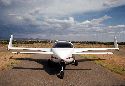
| Rolling back after first flight for some more tweaking, but we flew! | Canard aircraft are beautiful! (but I'm biased) | Another item checked off the list! | Some shots of the plane in paint. |
 |
 |
 |
 |
| The plane sparkles. Too bad the car does not. | Dad replaces a brake master cylinder. NAPA #UBP39102. Rebuild kit number 1287 for reference. | ||
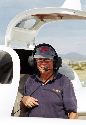 |
 |
 |
 |
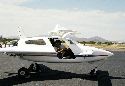
| Dad conducts a radio check. | Gull wing doors are a big plus in this design and sharp looking too. | Top NACA inlets. | |
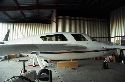
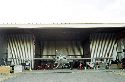 |
 |
 |
 |
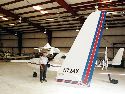
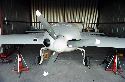
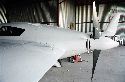
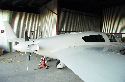
| Hangar Sweet Hangar. | Some more views of the rear and sides of the plane, now with main gear doors reinstalled. | The cowling is clean! I can't get over how shiny the paint is - you can see the surroundings reflected in it! | |
 |
 |
 |
 |
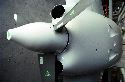
| Nice cowl to spinner lines. | |||
 |
|||
| Another GREAT year!! |
 Comments, questions, and suggestions are welcome! email: rich@rguerra.com
This page visited times.
This page created on a Macintosh using PhotoPage by John A. Vink.